The Practical Telescope #7
by Dennis Allen
Our club receives donated telescopes all the time. Many times these telescopes have something wrong with them: Bad finder, bad focuser, bad mount, etc. I like to work on these scopes and make them usable, so the club can give them away at our open houses. How I get these telescopes functioning and usable depends on the telescope.
60mm Refractor
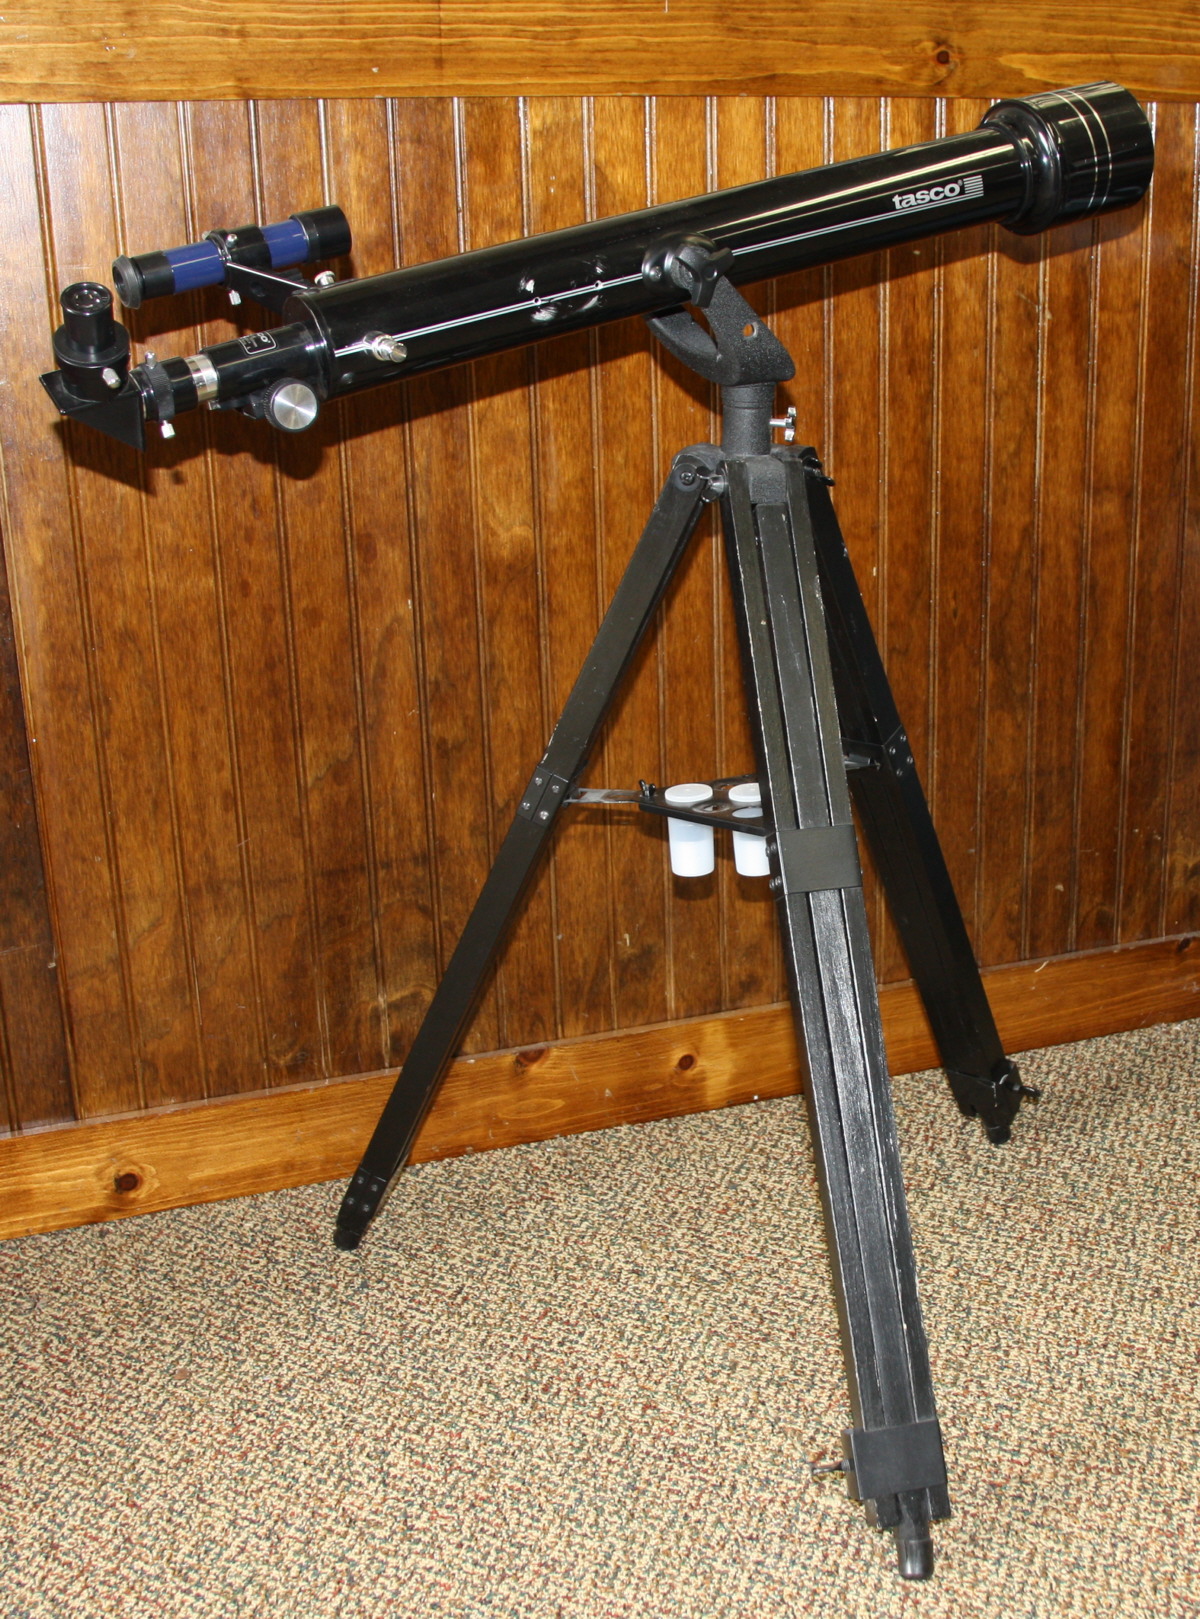
Last year the club picked up a basic 60mm Tasco refractor. The finder was junk, so I went on ebay and got another 5x24 finder. Only $10, but it works. I wanted to use 1.25" eyepieces, so I was going to order a hybrid diagonal. It seems, however, many of these Tasco scopes have a .96" eyepiece insert. To use standard 1.25" eyepieces, simply remove the insert. That was easy. I suggest the next owner get a 26mm or 20mm and maybe a 12mm 1.25" Meade 3000/4000 eyepiece. I would also suggest purchasing a red-dot finder. For certain patches of sky, a red dot works better than a 5x24 finder and vice versa.
The tripod on this refractor actually isn't bad. The manufacturer, however, made the tube way too noise heavy. Then they added an altitude arm to keep the scope from flopping over. Of course that makes the whole mount shaky and unusable. I moved the mount brackets to the center of the tube, the balance point. From that position, the mounting nuts have enough friction to provide smooth movement, no need for the altitude arm. Just remember: Before picking the balance point, remove the altitude arm and insert a regular eyepiece for weight. I used a light .96" eyepiece, making the scope nose light. To get the right balance point for 1.25" eyepieces, I had to move the brackets back toward the focuser.
b
FYI. If the tripod on your refractor is junk, sometimes you can mount the refractor directly to a camera tripod. Take a short piece of 1"by 3" trim and install a 1¼"-20 Hex drive wood insert. Then you can screw the piece of trim to the camera pan-head. Use a couple 4" pipe clamps to hold the refractor onto the trim. Ugly, but it works.
Short 114mm Reflector
Last winter I picked up a short focal length 114mm Celestron reflector off ebay, no mount. The eyepiece was junk, but the scope itself wasn't bad. Added a 5x24 finder and a red dot finder. A scope this small is perfect as a desktop Dobsonian. First, I built the tube box. I cut out three pieces of ¾" plywood. The bottom piece is square, the width of the tube plus the width of two pieces of ¾" plywood. The side pieces, same width but couple inches longer. At the top of the side pieces, I drilled holes for couple long ¼" bolts with wing nuts. To the middle of the side pieces, I drilled out and screw down couple 3" PVC end caps for altitude bearings. Then I screwed the side pieces to the bottom. When the scope is in the tube box, the ¼"bolts holds the tube.
For the rocker box, I cut two square pieces of ¾" plywood, 2" wider than the tube box. One for the rocker box, one for the base plate. For the sides, I used a 12"-by-6" piece of ¾" plywood. I drilled a 3" hole, dead center, then I cut the piece in half. I screwed the side pieces to the bottom and screwed a small 2" piece of plywood to the front, to hold the sides apart. On the bottom of the rocker box I drilled/nailed a sheet of Plexiglas. I prefer Formica, but I ran out of small pieces. For final assembly, I drilled a ¼" hole for the azimuth bearing. I installed four furniture feet in the rocker box's half circles, spaced about 90 degrees apart. I also installed eight furniture feet on the base plate, four to hold the rocker box and four to sit on the table. If you're altitude/azimuth movements are to loose, rub your surfaces with fine sandpaper for more friction. If the movements are too stiff, rub the surfaces with candle wax.
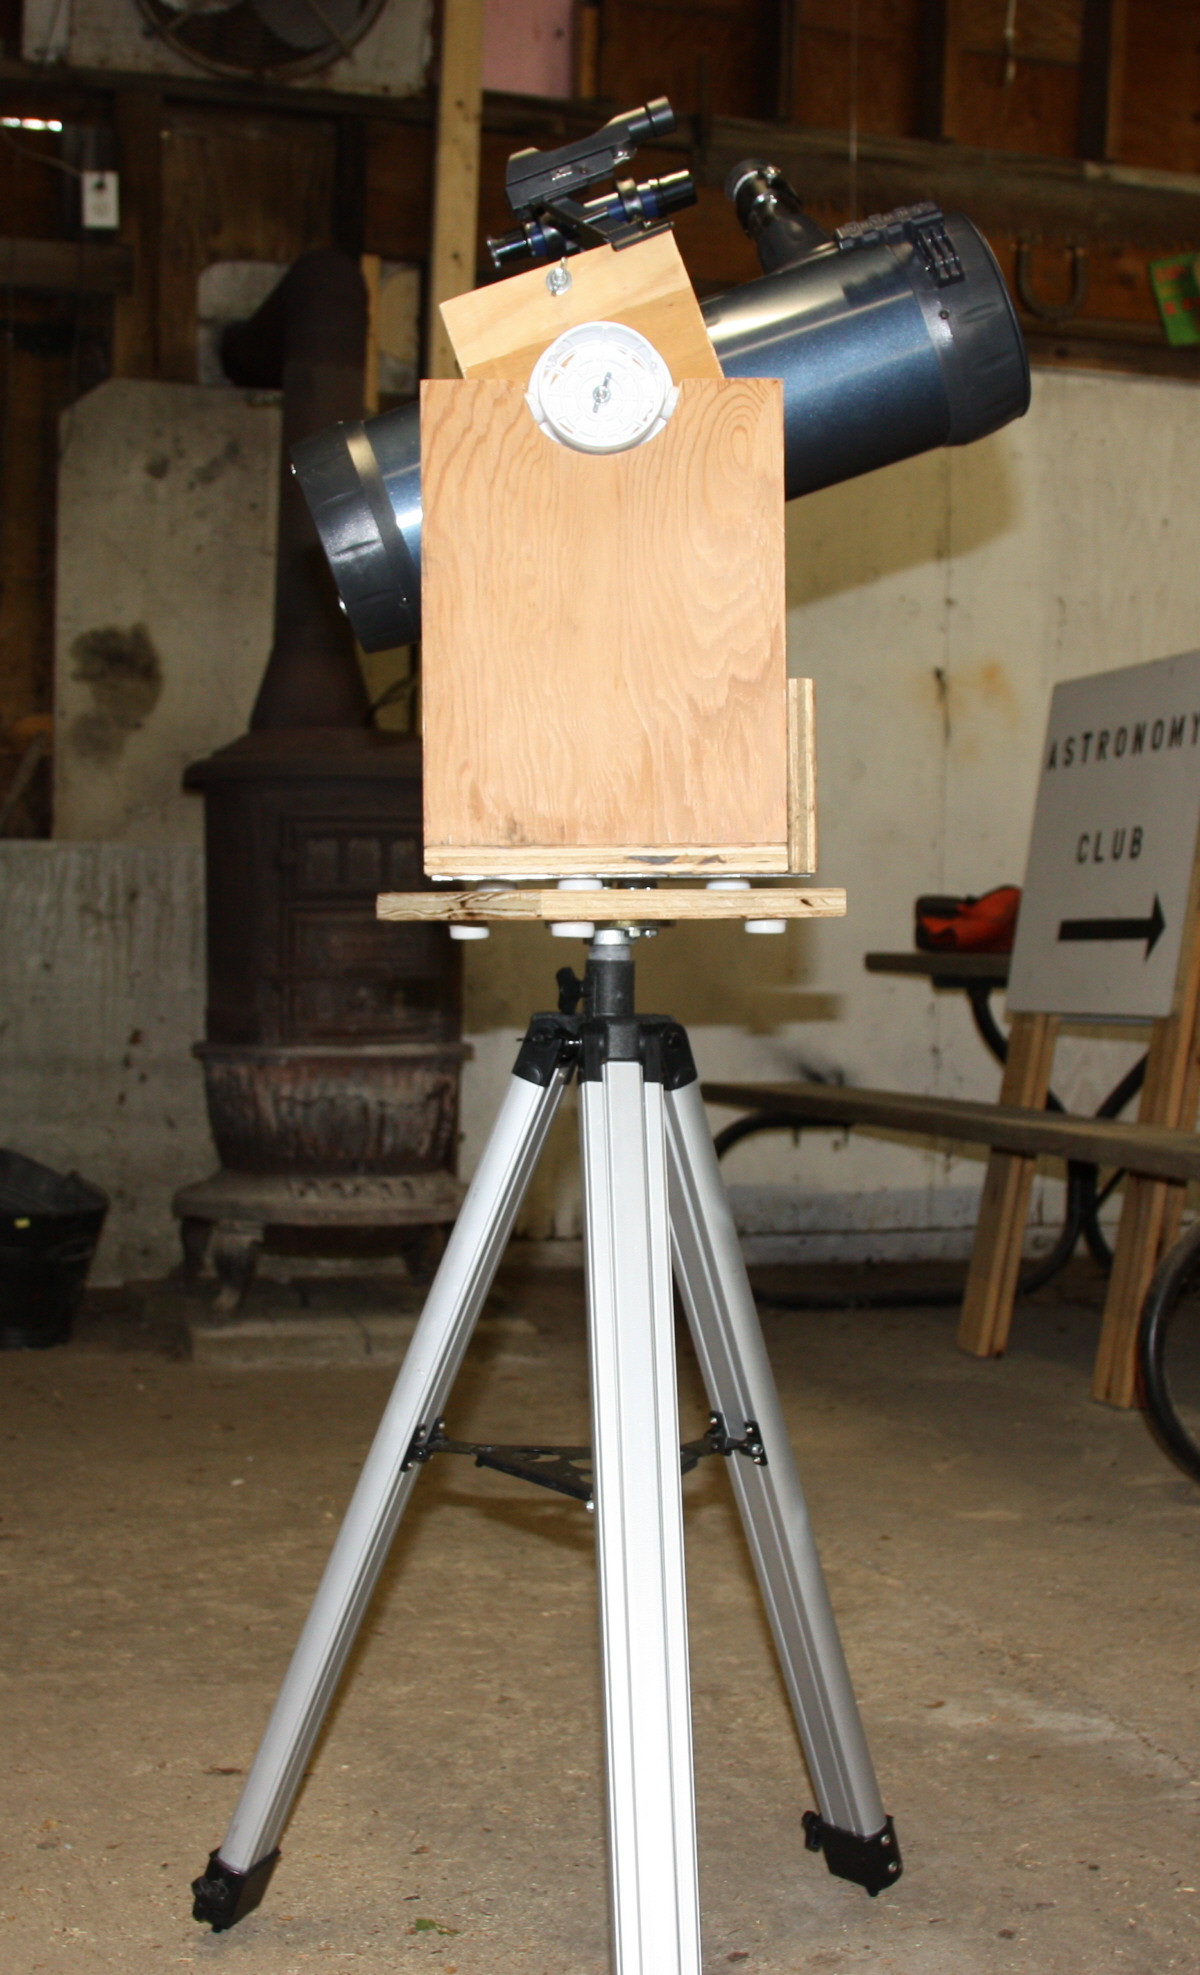
I could have left this scope as a desktop Dobsonian, but I had a leftover tripod from another scope. I drilled out the tripod's adapter until it could hold a 3/4" piece of short PVC snug. Then I mounted a 3/4" pipe flange to the bottom of the base plate, allowing me to mount the base plate to the tripod. This scope is a bit shaky on the tripod, but it's not bad and settles down quickly. With the tripod, the user can now set up anywhere.
FYI. To go back to desktop mode, you'll have to remove the flange.
Long 114mm Reflector
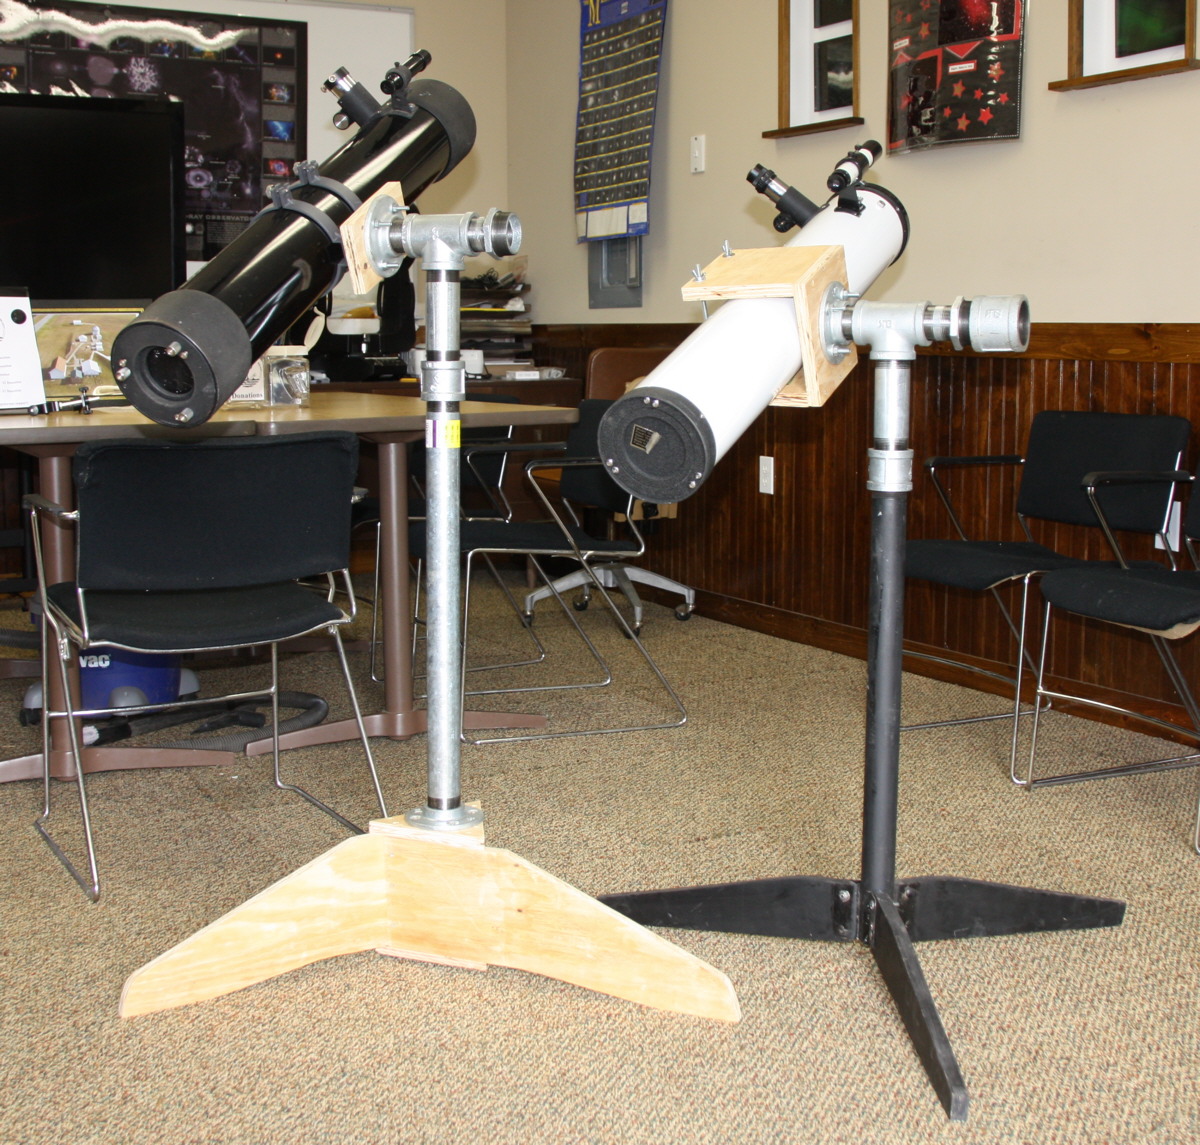
This spring we received two long focal length 114mm reflectors that needed new mounts. For short focal length scopes, a Dobsonian desktop mount works. Long scopes, however, scream for t-mount. A t-mount is a simple equatorial pipe mount. I had tube rings for the Tasco. For the Orbitor, I built a tube box. I cut out three pieces of ¾" plywood. The bottom piece is square, the width of the tube plus the width of two pieces of ¾" plywood. The side pieces, same width but couple inches longer. At the top of the side pieces, I drilled holes for couple long ¼" bolts with wing nuts.
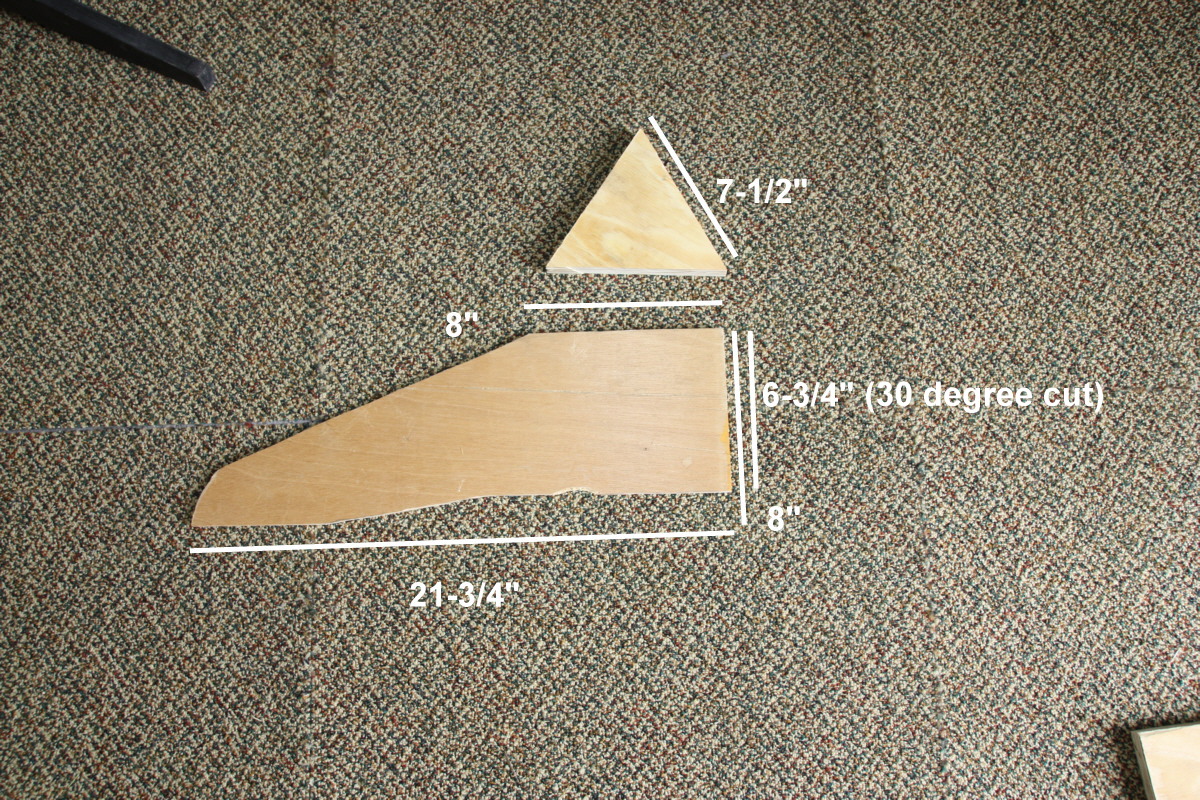
I had an extra t-mount tripod for the Orbitor. For the Tasco, I built a t-mount tripod. The tripod base consists of three sections of ¾" plywood., 21" long. The inside edge of each piece has a 30 degree cut. They come together to form a triangle. There are two triangle pieces of wood that cover the top and bottom. With this design, the middle never touches the floor. The trick with this design is that you can put couple scrape pieces of plywood under the middle to hold everything up, allowing you to assemble the legs and triangle plates.
The top of the tripod is capped by the 1-½" flange, a 2' length of 1-½" pipe, then a 1-½" tee. One end of the tee I attached a short pipe to another 1-½" flange. With the Orbitor, the second flange is mounted to the base plate of the tube box. With the Tasco, the flange is mounted on a piece of trim, which already has the tube rings mounted. For a t-mount, the other side of the tee can be used to hang counterweights. I usually find that these long 114mm reflectors require little or no counterweights.
Note: This is 1-½" piping. If the height is a bit short, just add another section of pipe.
[Return to Top]
[Go to Home Page]
Copyright ©
2021 Muskegon Astronomical Society, Inc.
This web page was last updated 06/05/25